The answer to the question: “How do I know if my design can be made?”
On this site you’ll find guidance for what the limits are for minimum line thickness and minimum sized gaps (like holes in letters). That’s great, but how does one go about measuring things in an image to see if they are too small? I do all of this when I work on a branding iron for you, but if you are going “DIY”, this can be a a useful guide. Feel free to contact me for help.
The easiest thing I have found for quickly gauging the “inch measurement” of something in a logo is to open it in a program called “gimp.” It is an open source, no spyware, free photo editing tool you can get from here https://www.gimp.org
After installing it use the menu in the upper left hand corner to
File -> Open
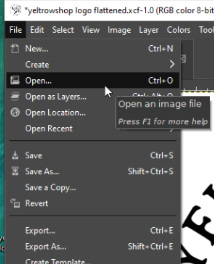
browse to your file.

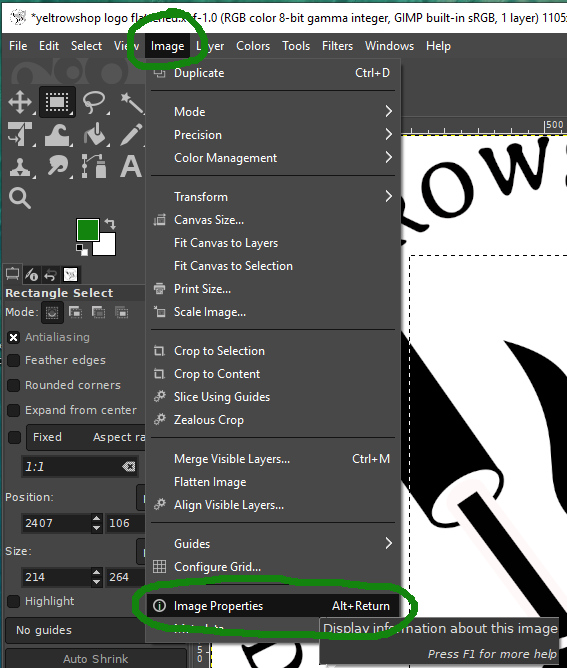
Then click
Image -> Properties
Note the LARGER of the two measurements in Pixels.
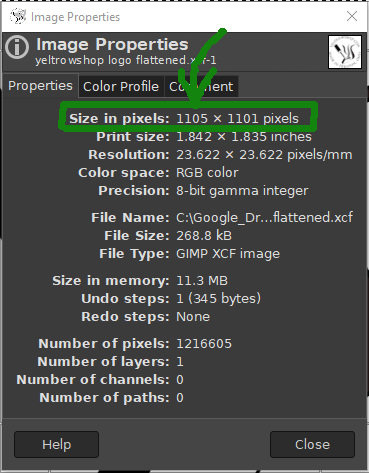
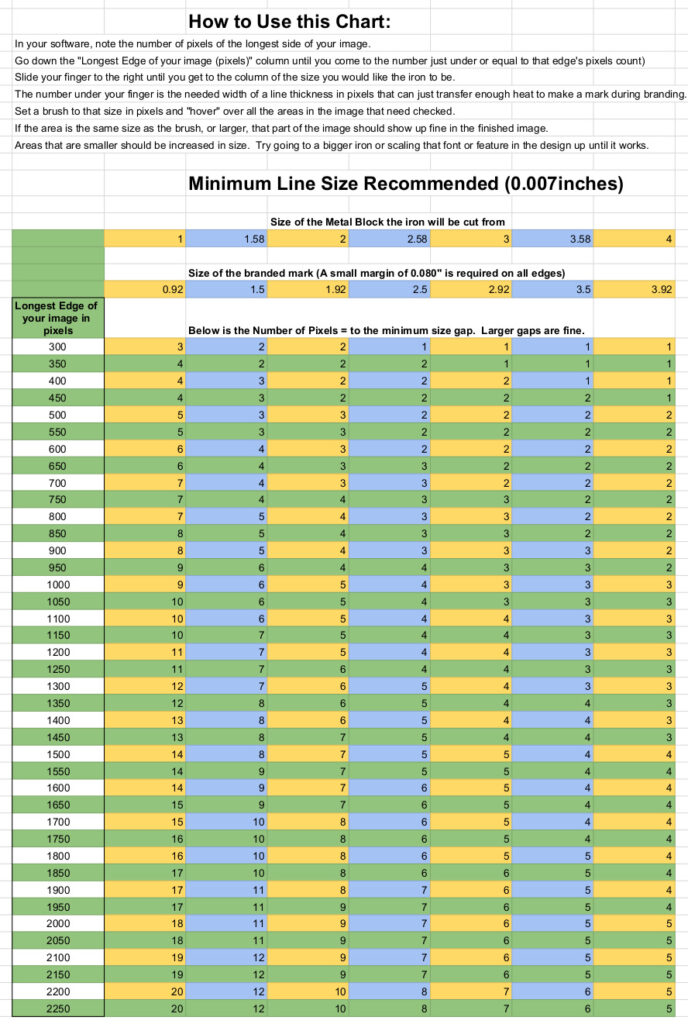
Now that we know how many pixels make up the longest side of our image, we can look that number up in a table to see how many pixels the minimum line thickness can be in an image.
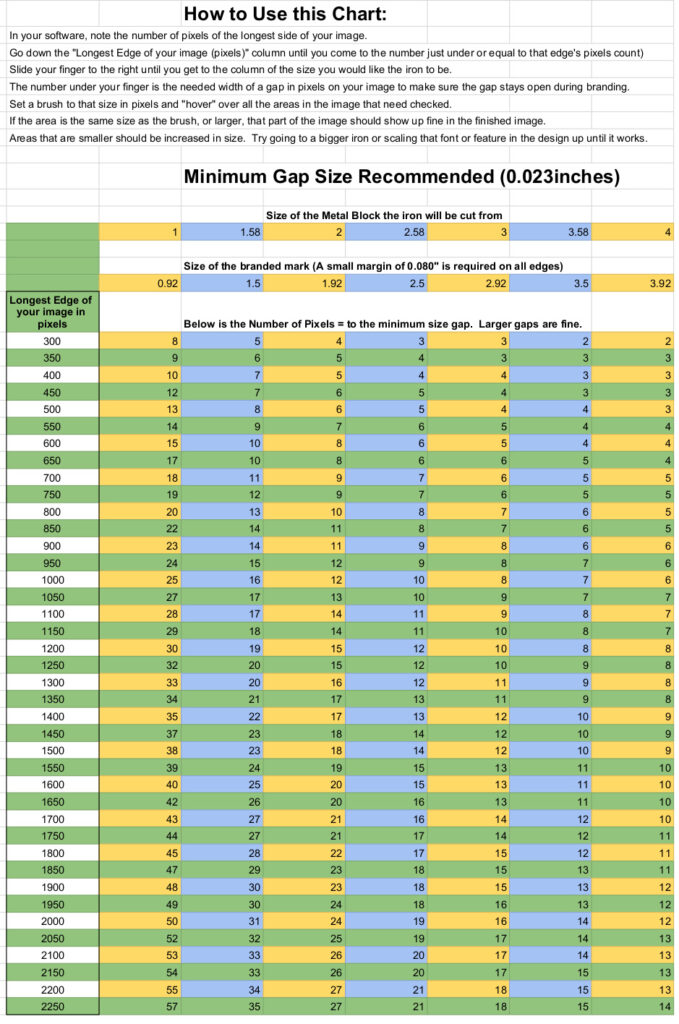
This google sheets document has the below chart in it. Find the number of pixels your image is in the left column then go right until you are below the number of inches wide your iron is. The intersection of those two columns is the minimum number of pixels a line can be and still turn out well as a branding iron. Example: 1100 pixel wide image going onto a 2 inch iron: 5 pixel wide line minimum.
Now what?
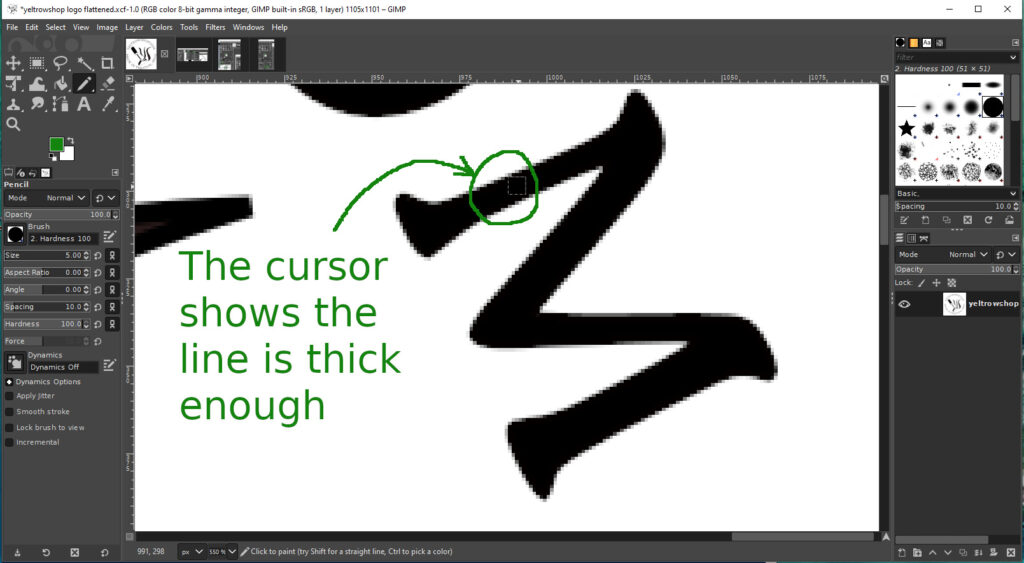
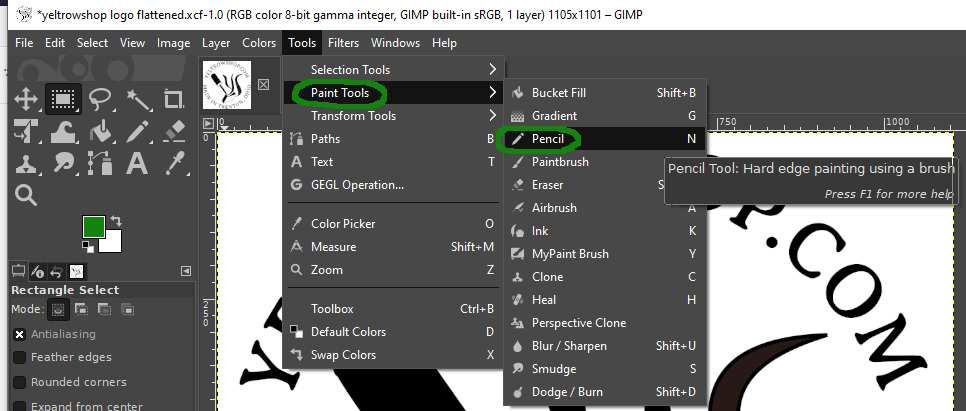
Now we grab the “paint brush” tool in gimp and set the diameter of it to the number of pixels we got from the table. This will give us a cursor the minimum size any line can be so we can hove it over various parts of the image to see if they are smaller than the minimum size.
Tools -> Pencil
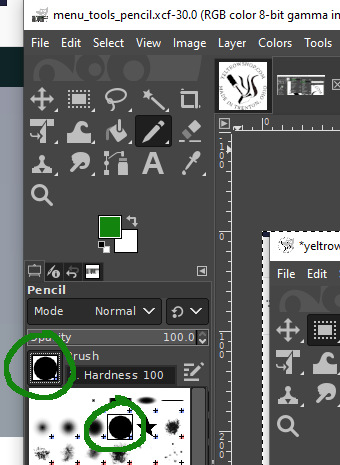
Now we set the brush type to a “hard circle”
Then we set the brush diameter to size we are comparing to: 5 pixels.
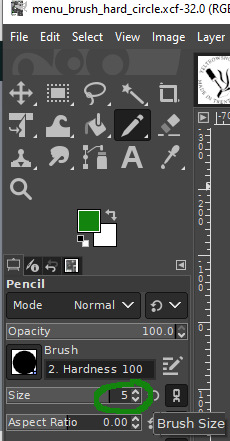
Now hover the brush over parts of your image to see if they meet the minimum line thickness requirements.
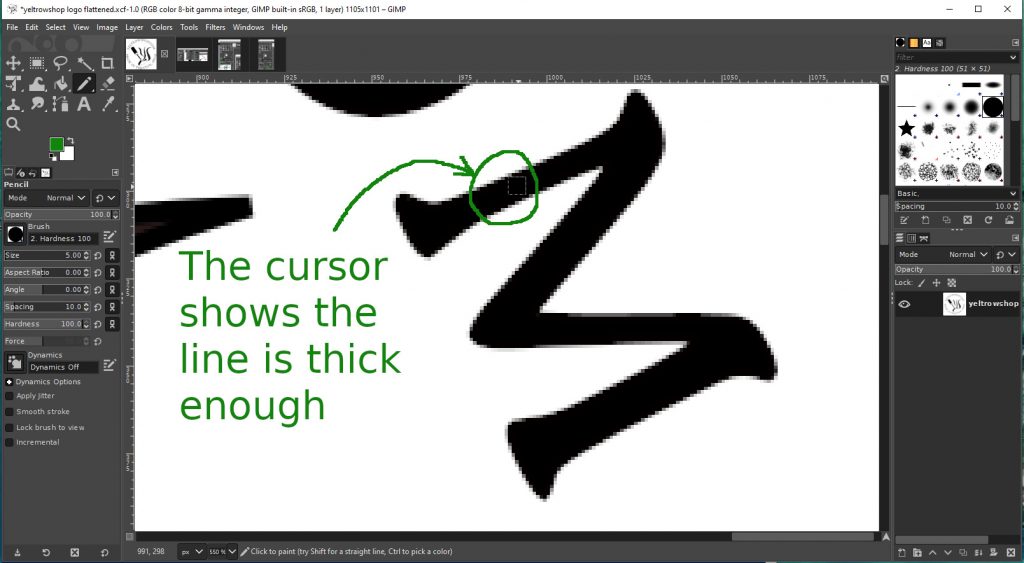
The same thing is then repeated for checking gap sizes. In this case an 1150 pixel image on a 2″ iron need 14 pixels of gap.
Setting the brush to 14 pixels we now hover the brush over various areas to make sure they meet the minimum gap size. Areas that often cause trouble the holes in the letters e, a, R, q, etc. In the below image, we see the brush fits inside the A, so the gap there is at least 14 pixels. This gap is cuttable and meets the minimum requirements for being made into a branding iron. Note the word minimum — A little larger wouldn’t hurt, but this will work.

So there you have it — Use the table to pick a brush size, zoom in with your mouse wheel, and scoot around the image making sure your design has spots the cutter can get into and lines that are thick enough to do a good job.